Shooting it: DIY – Heart-shaped bokeh

 Strobist info:
Flash is triggered by Pocket Wizard II Plus
A card with a heart-shaped hole in front of the Canon 85/1.8 lens.
The bokeh
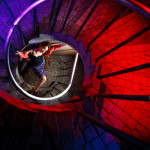
As I said the location for this shoot was Umeda, and exactly the bridge connecting the Hankyu & Hanshin Dept Stores, which is giving some nice view of the road around with beautiful night lights. And as there were not many people there after midnight we decided to to some shots! The concept was very simple, I wanted to use the bokeh behind her to look like it’s coming out of the cup that she is holding, and to make it interesting, we cut that heart shaped cards to put on the lens, and make some fun bokeh shape! As you can see the shape of the heart is not really perfect, and we liked it this way!
Size of the hole
You can see the important things about how to make the shaped bokeh on the image above, and I’ll summarize some of them here as well! About the size, the best way is to cut the whole of the card from end to end compared to the front glass of the lens you’re using, then you can get the best shape in the photo with a big enough size. If you cut it smaller you should know that you actually close down your aperture and you may lose the bokeh effect!
Black cardboard

Please use a Black paper or cardboard to make the bokeh, and cut the shape! Avoid any colors of you don’t want to mess up the white ballance, unless you are aiming to make some fancy effect with interesting colors, then that might be a nice trick for you! Gray might also be ok, but I prefer to use black cardboard to make it! It is a little difficult to cut it though. Also would be great if you can find some shapes that will match your lens size, I’m still searching for any!
Focus
Yeah, focus is a pain in the ass if you have the shape on your lens! Never worked for me in the dark, so I had to focus first without it, and then quickly move it in front of the lens to take the photo! I switch in Manual focus and shoot! Or I just half press the shutter button to focus, and then move the shape to quickly take the shot! You should keep that in mind too! Before I go to the lighting explanation here you can see the photo without the shaped bokeh:
Lighting
 Last but not least, the strobist info for the shot! I’m using a simple one light setup for the shot. As a light modifier I chose to use my 80×60 Softbox set left from the model. After we finished the shot and were reviewing the photos I realized that I actually missed to add some fill light behind her, but it was a good lesson though! With the shape in front of the lens I was losing a bit of light so I decided to bump mi ISO to 320 in that case, and I don’t mind doing that with the Canon 5DMII, if I was using the 50D I guess I would do my best to keep it at 100. The shutter speed was already quite low – 1/40 sec, which is enough for me to hand-hold it with the Canon EF 85mm F/1.8 lens! I am triggering the flash with a Pocket Wizard II Plus!
In the end…
So in the end I would like to mention one more time about our new project called Creative Lightbrary! We started it recently with my friend Ognyan Dimitrov, and we are going to post everything connected to digital photography where we will cover our experience with different light modifiers, DIY stuff, lighting diagrams, post production, useful software and many other tips. Our main goal is not to teach but to give everything that is useful for your journey in the world of digital photography. Click on the logo below to check it out!
Also follow our Facebook page connected with the project to subscribe for future updates, and we have prepared already many things to post soon! Here is the link to the page: Creative Lightbrary on Facebook

Trackbacks & Pingbacks
[…] 重点在那个心形散景,制作技巧早已不是秘密,详情按此。 […]
Leave a Reply
Want to join the discussion?Feel free to contribute!