Shooting it: Autumn Wedding & Bokeh Panorama
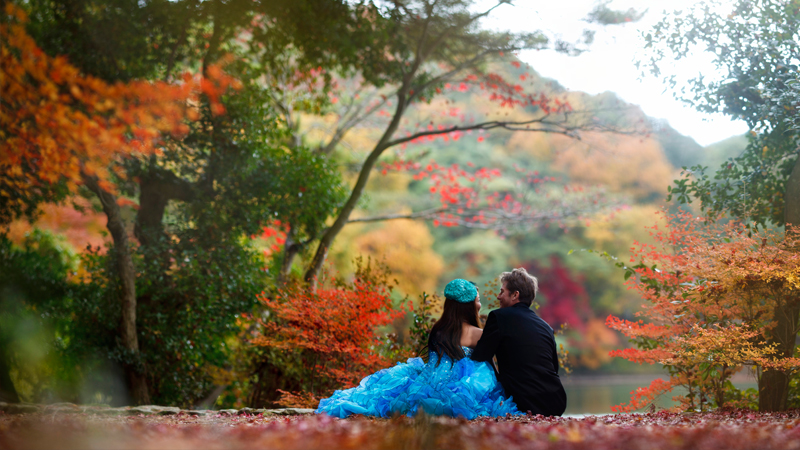
This article is about an engagement shoot I did some time ago in the autumn! The autumn in Japan is so beautiful, but unfortunately so short, so you have to be very tricky to get the best spots in the best timing! This is a public park in Kobe, called Futatabi Park, we were lucky to get some nice autumn colors there! I post it in both, Edit and Lighting categories, since I am using Bokeh panorama method to combine the photos!
Strobist Info & Gear:
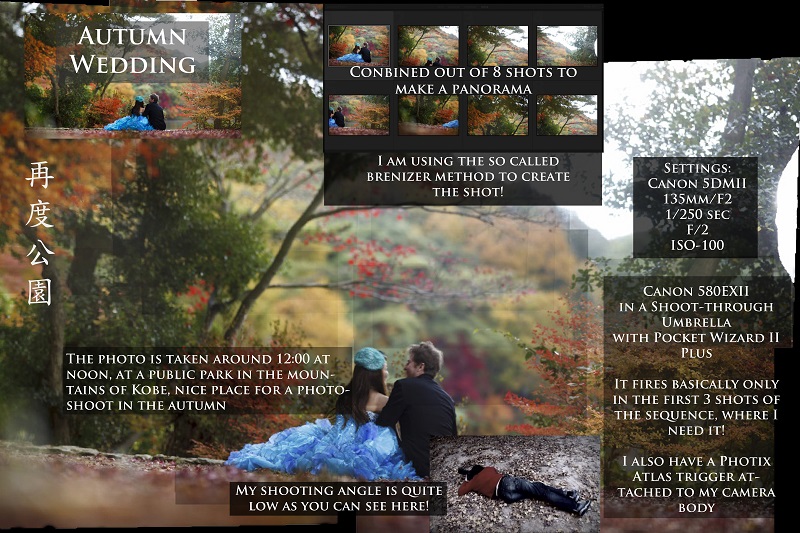
Canon 580EXII in a shoot-through umbrella – camera right for both shots; Flash is triggered by Pocket Wizard II Plus on the flash & Photix Atlas on the camera body.
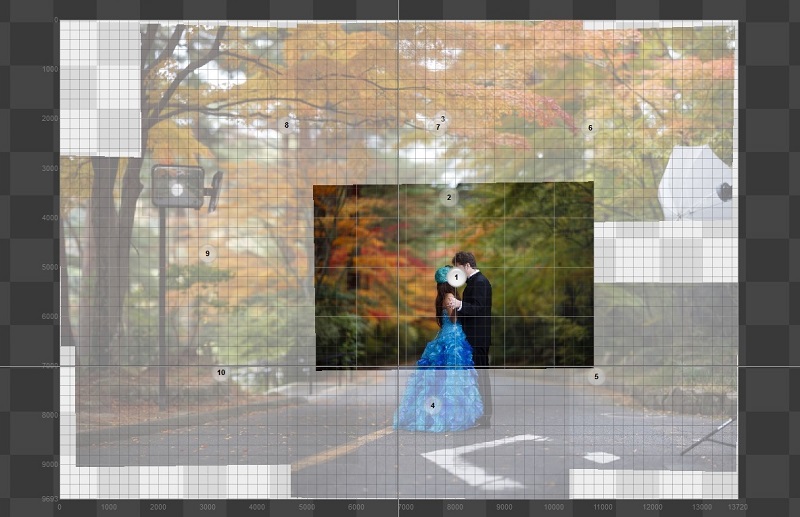
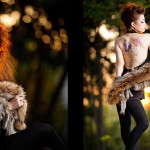
In the images below you can see the lighting setup for both of the shots, which is actually pretty simple, since I am using only on shoot-through umbrella to lit the couple in them. The main thing in these photos is that actually they contain multiple shots, combined into one, the so called Bokeh Panorama or Brenizer method that I will talk about more in the EDIT section later.
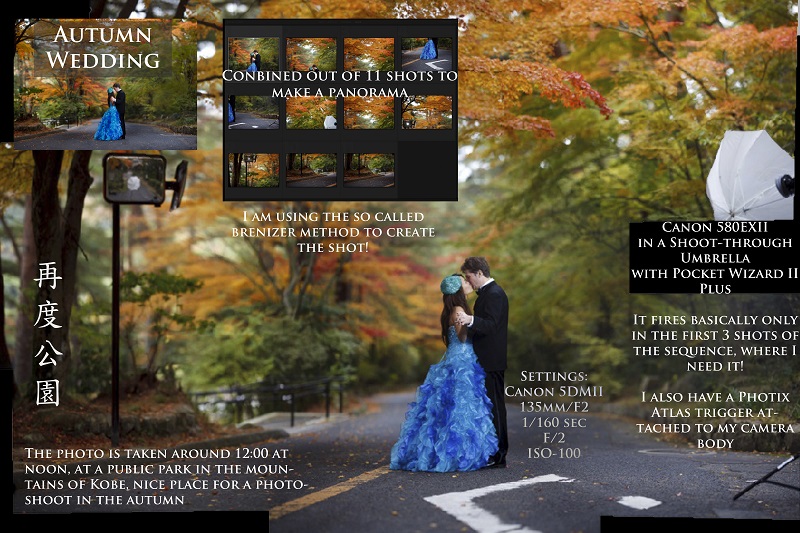
The flash is triggered by Pocket Wizard II Plus, which is attached to the Canon 580EXII, and since I had already broken the hot shoe mounts of my PWs, I’m using a Photix Atlas trigger on the camera body to fire the flash! Another important thing here is that since it’s a combination of 8 and 11 shots, and I don’t really need the flash to fire that many times, I have been first covering the couple in the first 2-3 shots with the flash firing at that time, and for the rest photos of the sequence I turned it of, to save the battery!
I am using Canon 5DMII for the session, which is my main camera! And the lens I’m using is Canon EF 135mm f/2.0 L USM, which is maybe the one I’m using most often! I love it for the way it compress the background, and the beautiful bokeh it creates! I will write an article only for that lens and my experience with it soon, but until then you can see some of the works I have with 135/F2 in my Flickr album dedicated to the lens – CLICK HERE!
Why Bokeh Panorama?
Well, many people really enjoy the shallow depth of field, which makes you subject pop, but the problem is that is you want to go a bit wider, then the wider you go you lose the shallow DOF. There comes this method. What do you need for it? You need a fast lense, (F/1.4 – F/2) and you need a software to stitch that shots in a panorama later in post! That method is also famous as Brenizer Method, since it’s been popularized my the photographer Ryan Brenizer, he is a master of it! So when you stitch the photos you take you can get a really wide angle shot, and still have nice shallow DOF, as it is in the photographs in the article!
Getting the source shots:
Before I go to how I edit the photos, let’s see how I shoot them! The main thing is to get the object that might move first quickly, and then shoot around them to get the environment! So I basically needed 2-3 shots in these photos shooting from up to down, and then I let them move, while I am working on the background! It is important to make sure that you have some overlap, in order to be safe when you go to the editing! If you miss some area, you will have to get creative fixing it in Photoshop then!
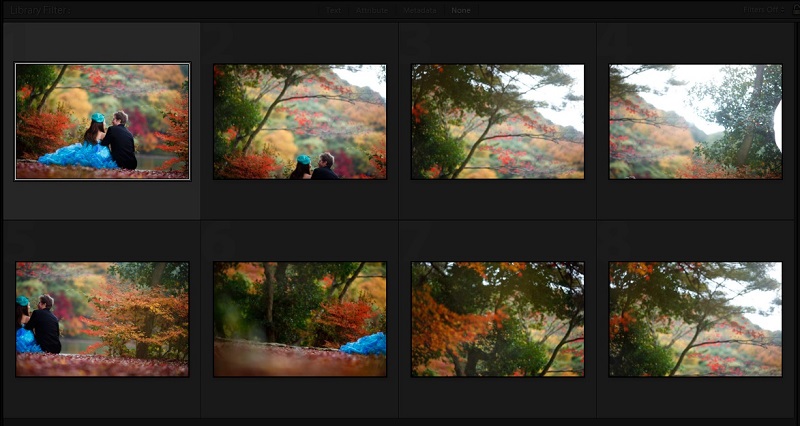
The first shot contains 11 photos as you can see in the screenshot below, I am shooting the couple first from up to down, and then I let them move while I’m shooting the background! Then I’m moving the camera counter clockwise, which is easier for me for the environment around them! You also need to be careful to get enough data for the software then when you are stitching them into one photo!

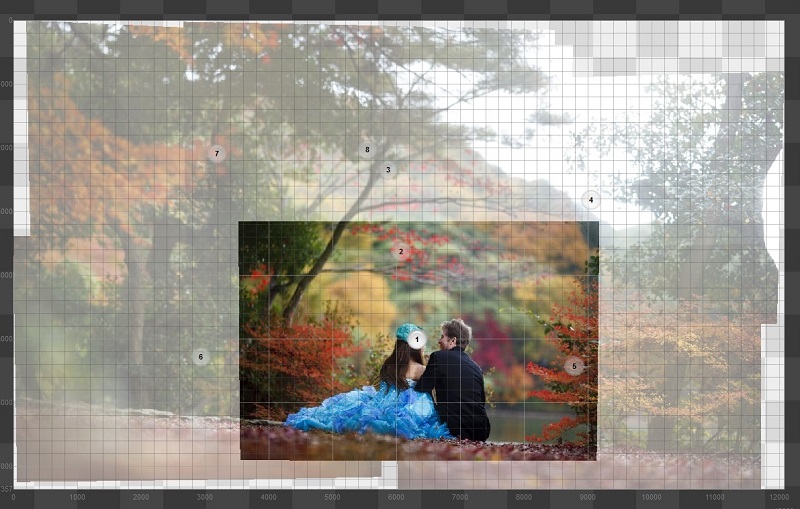
The second shot consists of only 8 images, but the principle is similar to the upper one! Here I’m lying very low on the ground to get that angle. I am not using tripod for any of the shots when I’m shooting bokeh panorama, it might be a good idea to use one, but I’m happy with the result without it!
And another thing that I mentioned partly earlier, when you shoot the Brenizer method with only available light you don’t need to care about it, but if you are using flashes, you might need to turn them off after you get the models, unless they play some role for the background as well. If they do, you need to make sure that they will be firing all the time! In these shots I have my flash firing only for the first 3 shots, then I turn them of by switching off my flash trigger while I’m shooting!
Editing
After you got some good source images from the shoot, you need some panorama making software to stitch them into one photograph! Basically every panorama software will do the job, you need to decide which one is good for you! What I first do is to do some basic settings in the RAW files, save them as JPEG, and then let the panorama software do it’s job!
If you have shot them properly, with enough overlap everything should be ok, bit if you have missed some part you might be disappointed with the stitching, I personally have had couple cases when it was quite impossible to get a final shot, since them I am really careful while I am shooting!
In the you only need to select the crop you like, and you are done! If you need to you might of course get to photoshop for some local fixes, and delete some objects you might not want in the photo, I personally do that as well!
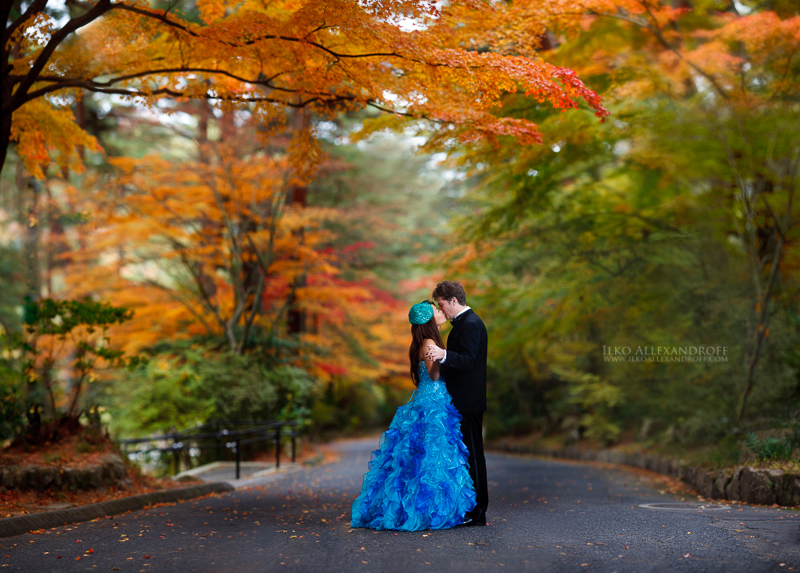
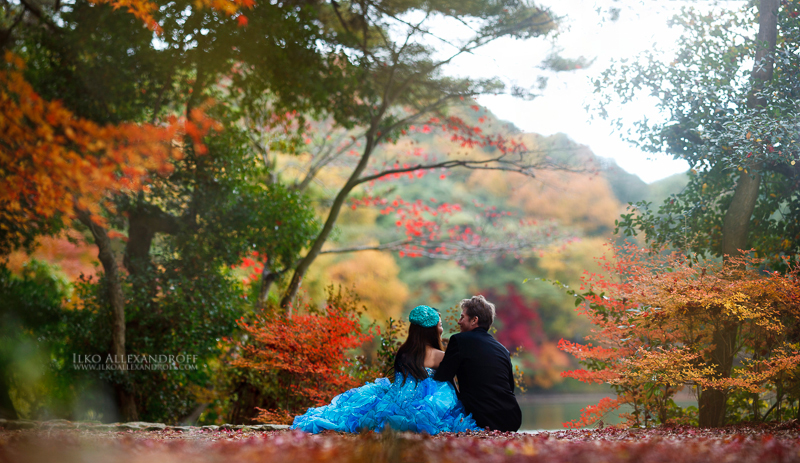
Final Result
So here are the final shots from the session! They are in the same order as I have been talking through the article!
I would be happy to ready your comments, and also you might post or send me your examples for the Bokeh panorama method! Thanks for reading, and stay tuned for some new articles soon!
©2013 Ilko Allexanroff Photography


Man this is great!!!!
Thanks a lot! I appreciate it!
Great explanation! I Your work is inspirational. I am going to try this.
Thank you, happy to hear that!
Thanks so much for this tutorial! Absolutely stunning results! Can’t wait to try it out!
Thanks for comment, Sean! I appreciate it! I would be happy if you post link to your results here after you do it! Good luck!
Do you keep the camera on manual focus for this?
Dear, Ron! I am shooting auto-focus, but I lock the focus after the first shot, so basically I only focus for it!
are you moving from one place to another?
or you stay only in one place?
Thanks, Calvin! I’m trying to keep the angle the same for all the photos, so the camera is only changing the direction, but not the position! I’m not using tripod, so even handheld it’s not that difficult! The main thing to worry in this type of shots is not to miss some part of the background, because after that “photoshopping” is might be a pain in the butt! 😉
Firstly, you take fantastic photos! I found you on Flickr a couple of weeks ago and now dream that my photos will look as good as yours one day.
I had an attempt at the so-called Brenizer panorama and had a few questions (if you don’t mind answering that would be greatly appreciated!)
Here are my attempts:
http://www.flickr.com/photos/98075970@N02/12133270916/
http://www.flickr.com/photos/98075970@N02/12133009424/
My questions are;
Once you have the pictures that will make up your subject can you get them to completely move out of the frame, along with any lighting equipment providing it isn’t integral to the background?
I used a soft box in my first panorama that was overlapping with a tree and had to clone it out in post. As my post skills are not great I enhanced the background blur and also blurred the foreground to give it a swing-tilt effect and cover up poor cloning etc. In your pictures it looks like you just crop around the equipment.
All the best
Sam
Dear Ilko,
Your pictures are amazing. Your tutorial inspired me to try the brenizer method. I stil have a couple of question. I shoot with a 85mm canon lens and while shooting the brenizer I shoot at f2. WHat distance should I be from the subject ? and why do I have some sharp spots in my bokeh?
Thanks a lot, I’m happy to hear that! I usually stay at a distance that I could get the person in the photo for about 3 shots from up to down! So basically it’s from the head to the waist in horizontal position! Then from the same spot I shoot the rest of the scene!